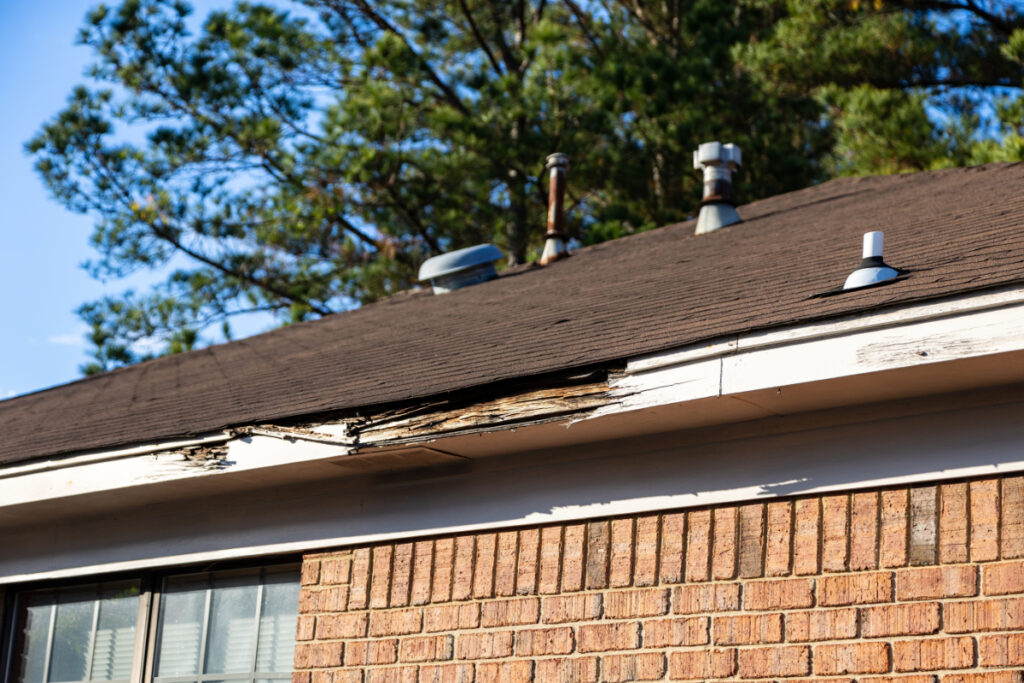
A Step-by-Step Guide to Repairing Termite-Damaged Fascia
Termites may be small, but their destructiveness has the potential to cause significant structural damage to your home. One of the most frequently affected areas is the fascia, the horizontal board that runs along the lower edge of your roof. If you live in an area prone to higher termite populations, you’re at an increased risk for property damage, such as termite-damaged fascia.
The best course of action is to work with pest control experts to prevent infestations before they occur. Still, if your pest issues are already past the point of prevention, we’re here to provide crucial tips for fixing fascia boards and other structural problems.
Key Steps to Repair Termite Damage
Step 1: Assess the Damage
Before you jump into making repairs, start with a thorough inspection of the damaged area. This could involve working with a professional inspector as well as pest control professionals. With these experts on your side, you can create a comprehensive determination of what repairs will be necessary and how long the entire process will take.
It’s important to note that termites can hide inside wood beams and structures for long periods, so completing only a superficial inspection could miss deeper issues. Check for small holes and hollow-sounding wood and any other visible signs of termite activity, such as mud tubes.
Step 2: Determine Your Next Move
This step will require some thought, and it will also be necessary for you to consult with the experts. Carmel Valley Pest Control is proud to provide the best termite control San Diego has to offer, and we’re here to help you determine the next steps in the recovery process. When you work with our team to eliminate all of the pesky termites on your property, you can also work with a professional contractor or roof repair company to handle the termite-damaged fascia. If you decide to go at it alone, the following step will help you complete the repairs safely.
Step 3: Remove Damaged Fascia
You can remove the damaged fascia using a pry bar and a hammer. Be sure to do so slowly to avoid damaging the surrounding structure. If you’re dealing with severely rotted wood, a circular saw will make removal easier. Dispose of the old, termite-infested wood promptly to prevent further infestation.
This step is incredibly hands-on and requires the use of tools and machinery. If you aren’t comfortable maneuvering these tools, especially at roof height and on a ladder, contacting an experienced contractor to handle this step can be a good idea.
Step 4: Fascia Treating the Exposed Area
After all the termite-damaged fascia has been removed, you’ll likely see exposed underlying structures that could also be compromised. Prompt action is crucial at this step. Our team will work quickly and thoroughly to treat the exposed areas with termite-killing products and techniques to eliminate any remaining pests.
Step 5: Create a Long-Term Plan
Once all the termites have been removed, you can begin rebuilding and repairing your home. Even after the fascia is replaced and your home is pest-free, it’s important to make a plan for the future that focuses on prevention and proactive pest control. Carmel Valley Pest Control is your best resource if you need routine termite control in San Diego.
Work With Us to Prevent Future Infestations
Regular inspections are crucial for maintaining a termite-free home, especially in termite-prone areas like San Diego. Our team of experts provides comprehensive termite control services. Routine maintenance and timely repairs to your termite-damaged fascia save you money and stress in the long term. We will work with you to create a plan for regular maintenance and inspections to ensure your termite infestation never reappears.
Repairing termite-damaged fascia is an essential home maintenance task. These steps will revitalize your home’s appearance, keep your family safe, and ensure your roof remains structurally sound.

